Thanks to its lightweight account and value proposition, Dust Evil one has actually become one of America’s leading vacuum brands. If you’re searching for an easy, light-weight, and useful vacuum, it’s tough to fail with the Dirt Devil vacuum.
Nonetheless, too much usage can clog the vacuum cleaner with dirt. To provide an excellent cleansing, you require to take them apart. However, many people are locating it hard to take apart their Dirt Devil Vacuum Cleaner.
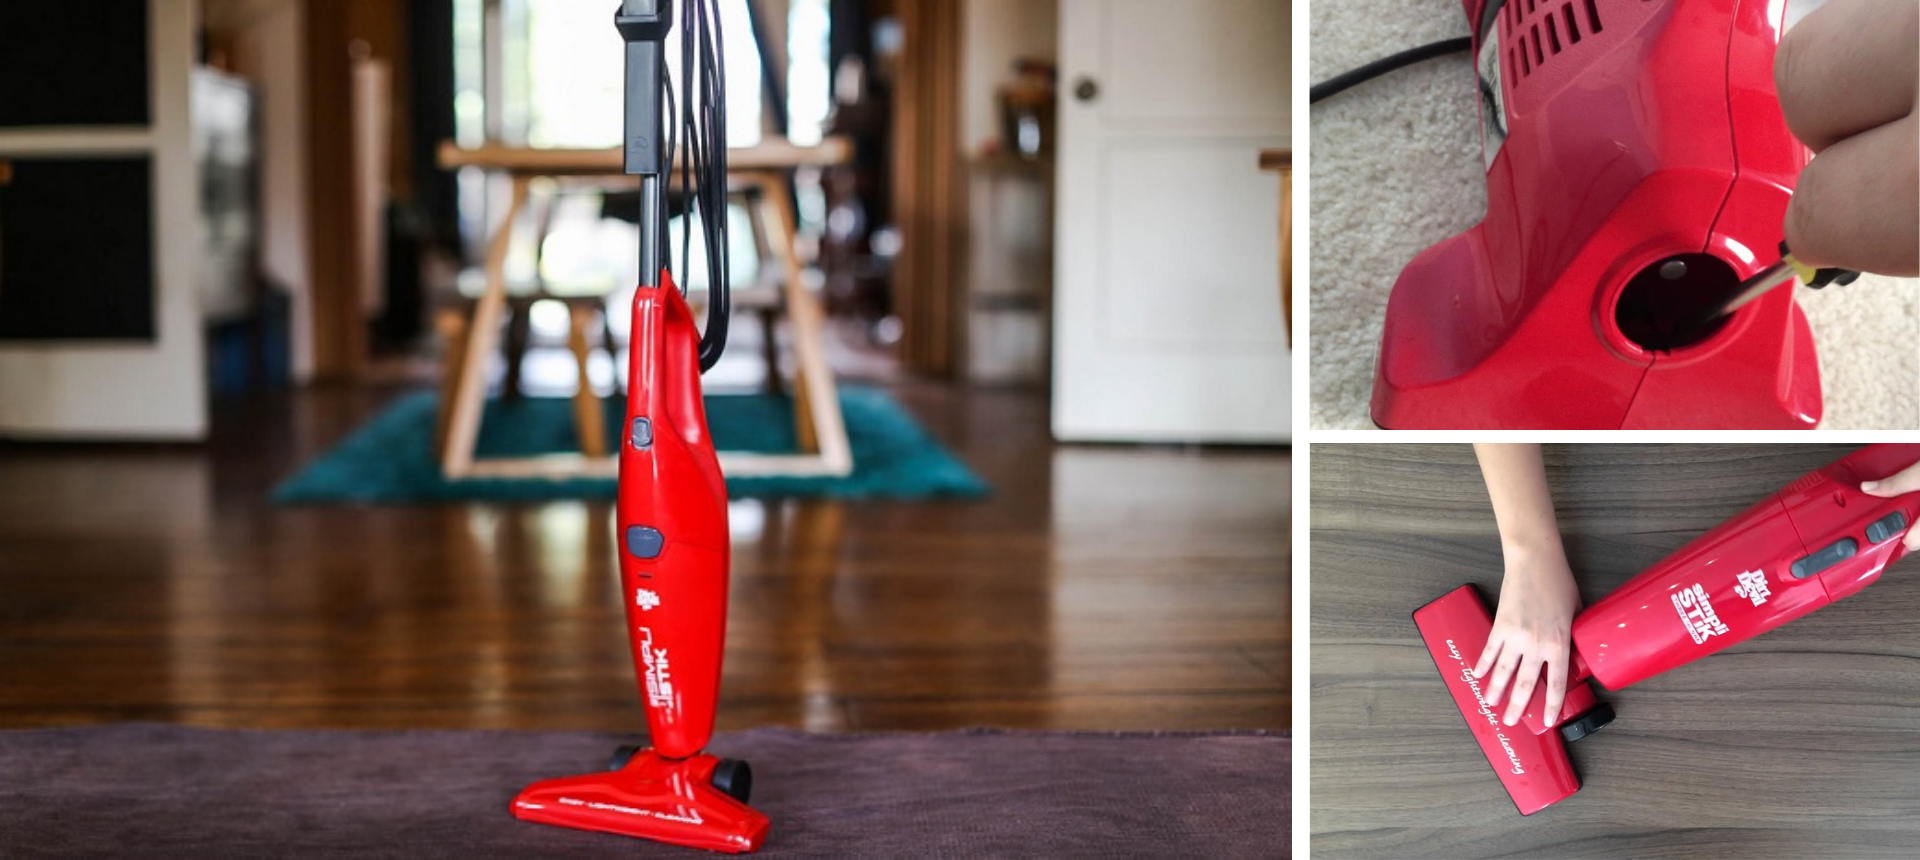
To take apart a dirt adversary vacuum cleaner, begin by placing it with the launch button up. Next off, eliminate the battery, and detach the dust mug by pressing down on the button and pulling out the mug. Remove the metal plate and manage the brush head faces. Just follow the instructions step by step.
Remove the Power Block or External Battery
Most upright designs of the Dust Adversary vacuum line come with an external battery or power brick. Find the power block on the side of the vacuum cleaner set. It ought to be affixed with a wire to the battery charger plug out of the Air Conditioner outlet to air dry. Take out the power block and set it aside for the meanwhile.
Lay the Dirt Adversary on the Floor
Taking apart your Dust Evil one can get messy, particularly when it’s been a while since your last cleaning. So place a sheet of newspaper on the floor to capture the dirt and debris that will go down from the vacuum.
Lay the Dust Evil one horizontally on the floor with the suction head in the paper, which gives a strong suction power. Turn the vacuum so the side where the take care of is located is dealing with upwards.
Remove the Collar
Now, we require to detach the manager by turning the securing collar at the base of the take care of counterclockwise. In case the securing collar won’t turn, a quick spray of a lubricating item should loosen it up. Maintain turning the collar counterclockwise up until you can’t anymore. Get the deal with and draw the take care of far from the collar. Just maintain drawing the deal with till completion detaches from the vacuum’s framework.
Unscrew the Sections
Transform the take care of to its side and you need to see a screw encountering up. Order your # 2 Phillips screwdriver and secure the screw and established it apart in a little container or paper mug for safekeeping. Next off, utilizing your hands, draw both areas apart.
Launch the Dirt Mug or Canister
Check the vacuum cleaner for a specific button that will release the dust mug or cylinder. It’s typically near the all-time low of the device. Push the button with one hand while holding the canister or dust cup that’s linked to the bottom of the vacuum. Remove the dirt cup off the vacuum and launch the switch. Vacant the dirt cup into the trash, get rid of the filter inside and wash the cup with cold water. After that, alloted the mug.
Remove the Screw of the Brush
Revolve the vacuum cleaner so the side where the bristles are located is dealing with upwards. You ought to see the screws on each side of the bristles so utilize your screwdriver to remove them. If you locate it hard to get to the screws, attempt pulling away from the bristles from the vacuum structure. Again, maintain the screws safely in a
Remove the Brush Head for Cleaning
Now, you should have the ability to remove the brush head. You can currently wage cleansing all the components. If you’re going to wash the vacuum get rid of water, make certain that you dry them effectively prior to reassembly.
Congratulations, you’ve simply disassembled your Dirt Devil Vacuum! It might seem like a particularly complex task but Dirt Devil did excellent work with the vacuum’s modular style. It’s not that challenging as many people think.
Leave a Reply